Testnet Stage 3 is now live with a new design, enhanced security, and added features
Experience the beginning of the core user experience by depositing assets into the MASP with Stage 3.


Table of Contents:
Firstly, thank you to all our testers for your continued support and feedback: we could not do this without you. Testnet Stage 2 is now completed and it provided us with valuable insights resulting in several updates to the codebase.
We are excited to announce that Stage 3 of our testnet is live. Stage 3 enables users to use the newly allowlisted test Matic and test $ZKPs in Panther's Multi-Asset Shielded Pool.
On depositing $ZKP, users may divide their ZKP deposit holdings to store it as a zAsset ($zZKP) or as zAccount Gas (Gas $zZKP). The Gas $zZKP can be used to pay for Protocol fees, relayers, Oshiya, and any external services that enhance protocol services.
One of the key compliance requirements on the Panther roadmap is building different disclosure mechanisms. Stage 3 includes basic disclosures, which can be found under the History tab. We expect to improve the information within the History tab in future testnet stages.
This testnet stage comes with an enhanced circuit to improve KYT/KYC signer fields, overall protocol security through extended zAccount UTXO, and further improvements related to scaling and rewards. Supporting these updates required retrofitting previous stages and end-to-end testing, resulting in Stage 3 being released later than we initially planned.
For a complete list of Test Stages, visit the Panther docs.
Get started with Stage 3 testing
To start testing Stage 3, visit the Panther Protocol documentation for the updated test link and follow the steps outlined below. Here are a few additional details to consider before you start testing:
- Previously created testnet accounts will need to be reactivated for Stage 3. The protocol will treat these as new accounts. To that effect, all prior testing Rewards (ZKP and ZKP equivalent of your PRPs) will be sent to your EOA (externally owned account) used for creating the account.
- You can also create a brand new account and complete the KYC process to continue. Here’s a guide to creating your account.
- After activating your zAccount, if you immediately go to the ‘Deposit’ or ‘Voucher’ etc. screen, you may see the action button with the status “Oshiya Processing/Syncing/Mining.” It may take a few minutes for the testnet to complete as it waits for Oshiya to process your account activation. The buttons will be active once that is done.
- During the first interaction with the dApp, it downloads the ZK proof information in the background (close to 100MB). While this happens, you may see a status on your action button saying “ZK Proof downloading,” this needs to be completed before any user action can take place.
- Onboarding rewards have been increased to 5000 PRPs to reflect that this stage retests the onboarding flow.
Once you’ve created your new testnet account, follow these steps to make a deposit to your account:
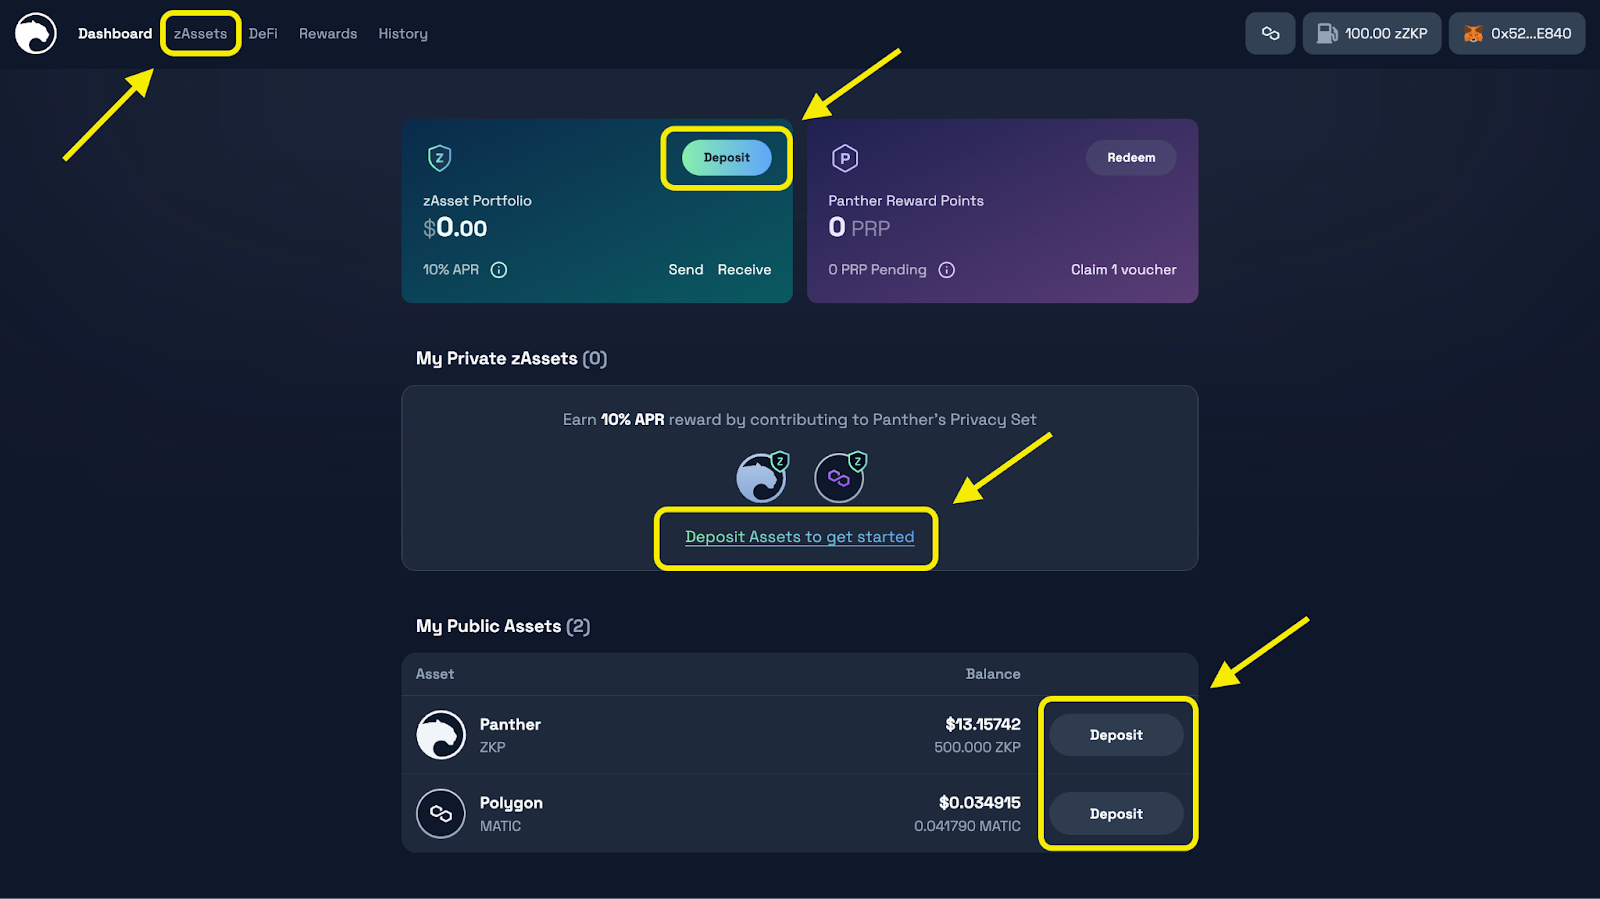
Step 1: Initiate a deposit
Go to the Deposit screen by selecting any of the available options:
- Within the zAsset menu item, click on the Deposit button as shown in the screenshot below.
- Within the My Public Asset section in the Dashboard, select the token; this takes the user to the Deposit screen.
- The Private zAsset section; which also has the option to select and deposit
- On zAsset Portfolio, click on the balance card.
Step 2: Select the token type
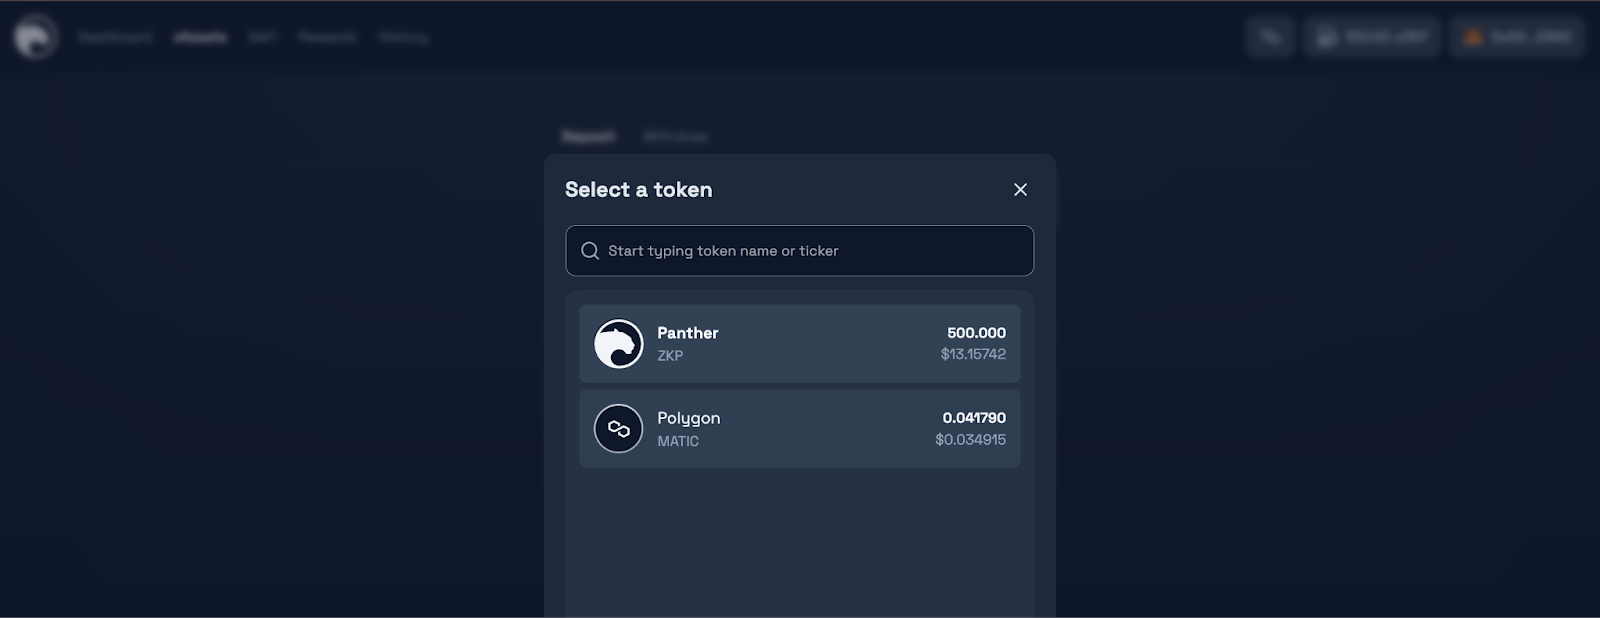
Select the token to deposit if it is not preselected, or adjust your selection via the token selection modal window.
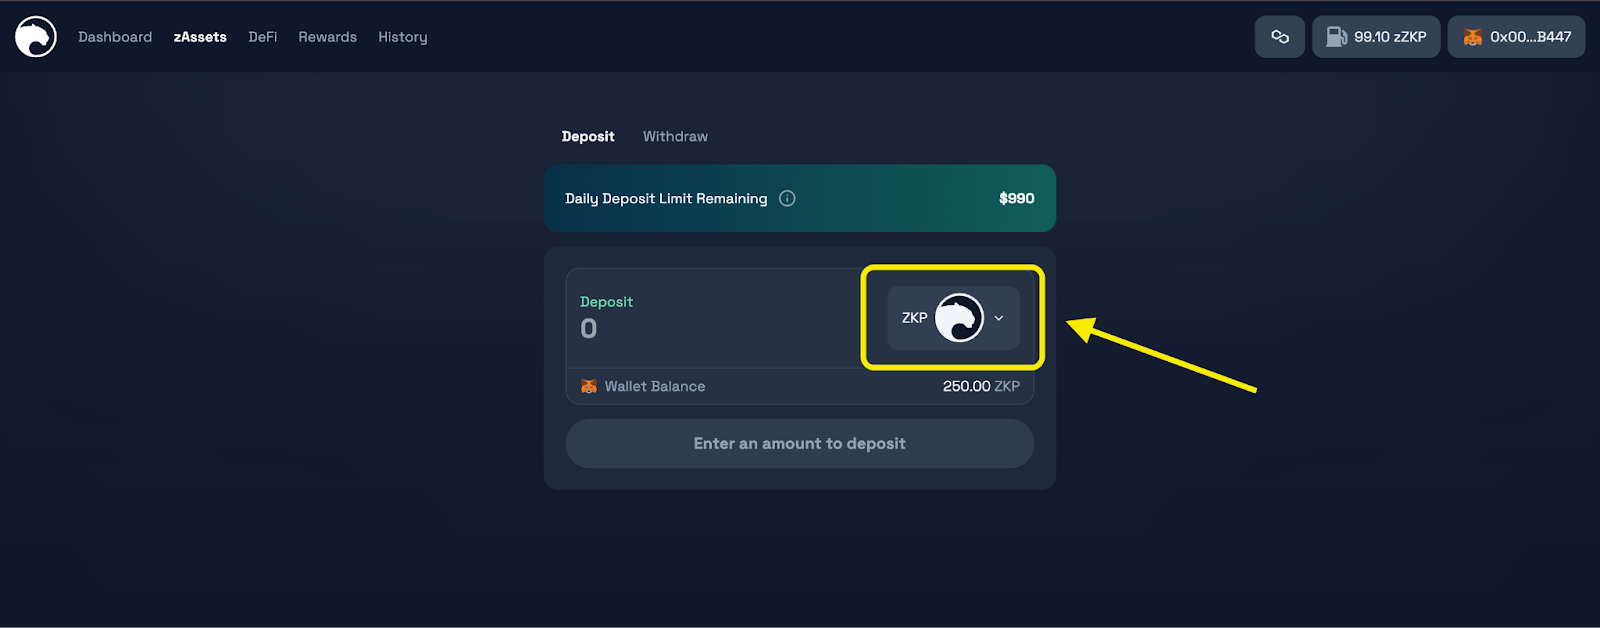
NOTE: ZKP has its own dedicated deposit flow, which supports splitting a deposit amount between two zZKP subaccounts, zAsset and Gas. The Gas can be used to pay for relayer or verification services in a privacy-preserving way; with no direct interaction with a blockchain.
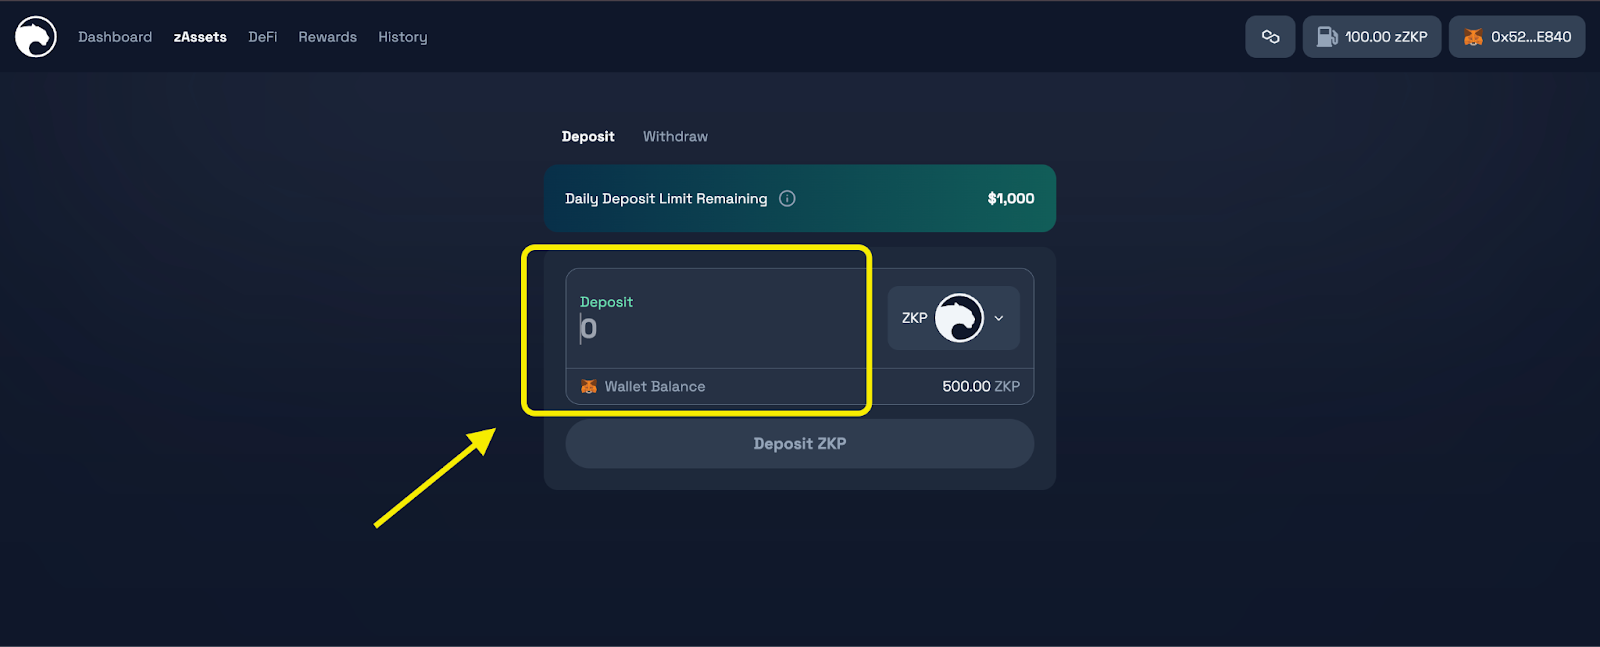
Step 3: Set up the deposit
3.1 Enter the amount to deposit.
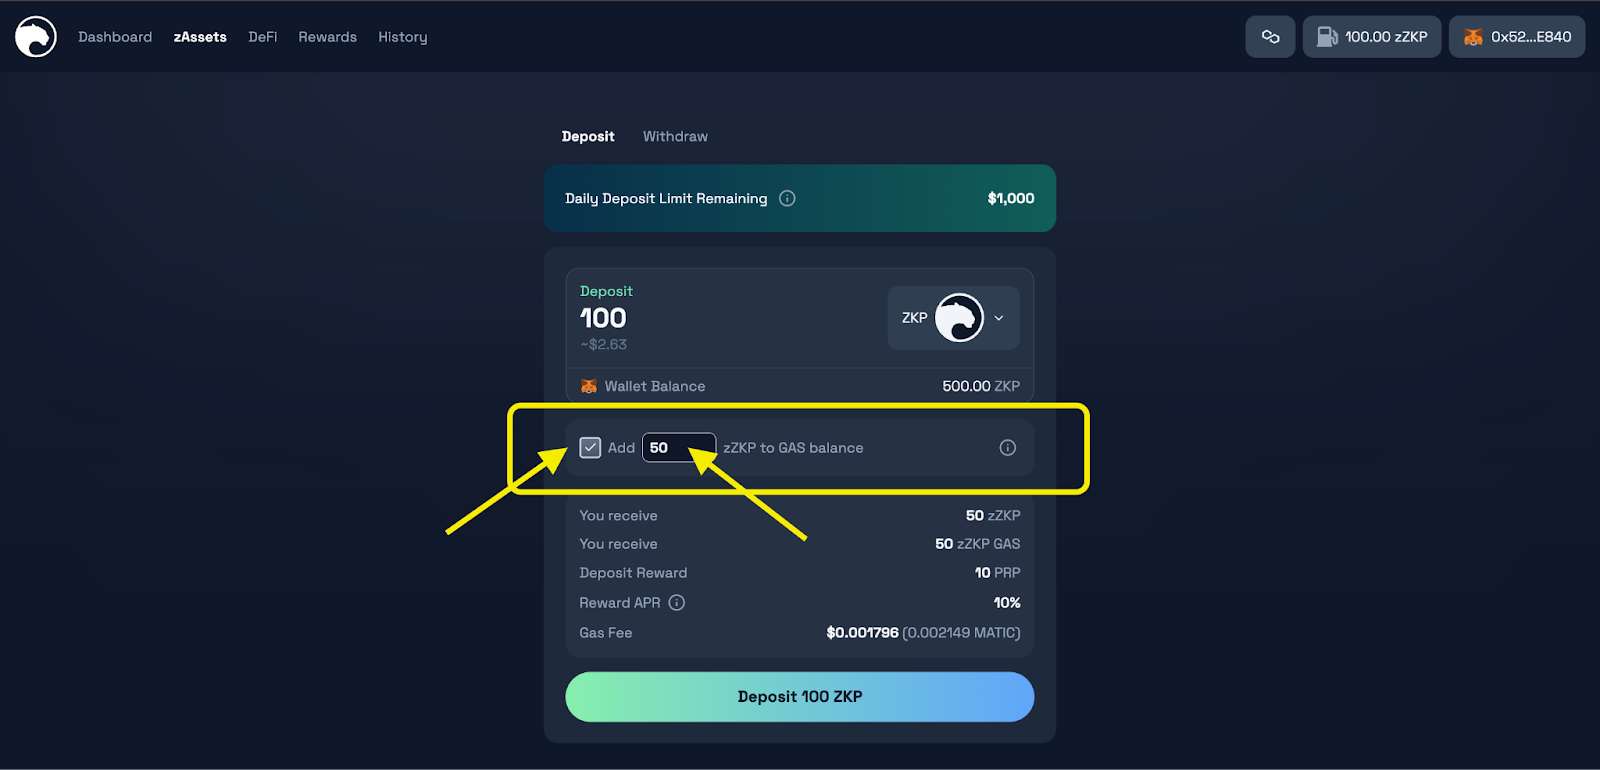
3.2 Click the Deposit button and complete the transaction.
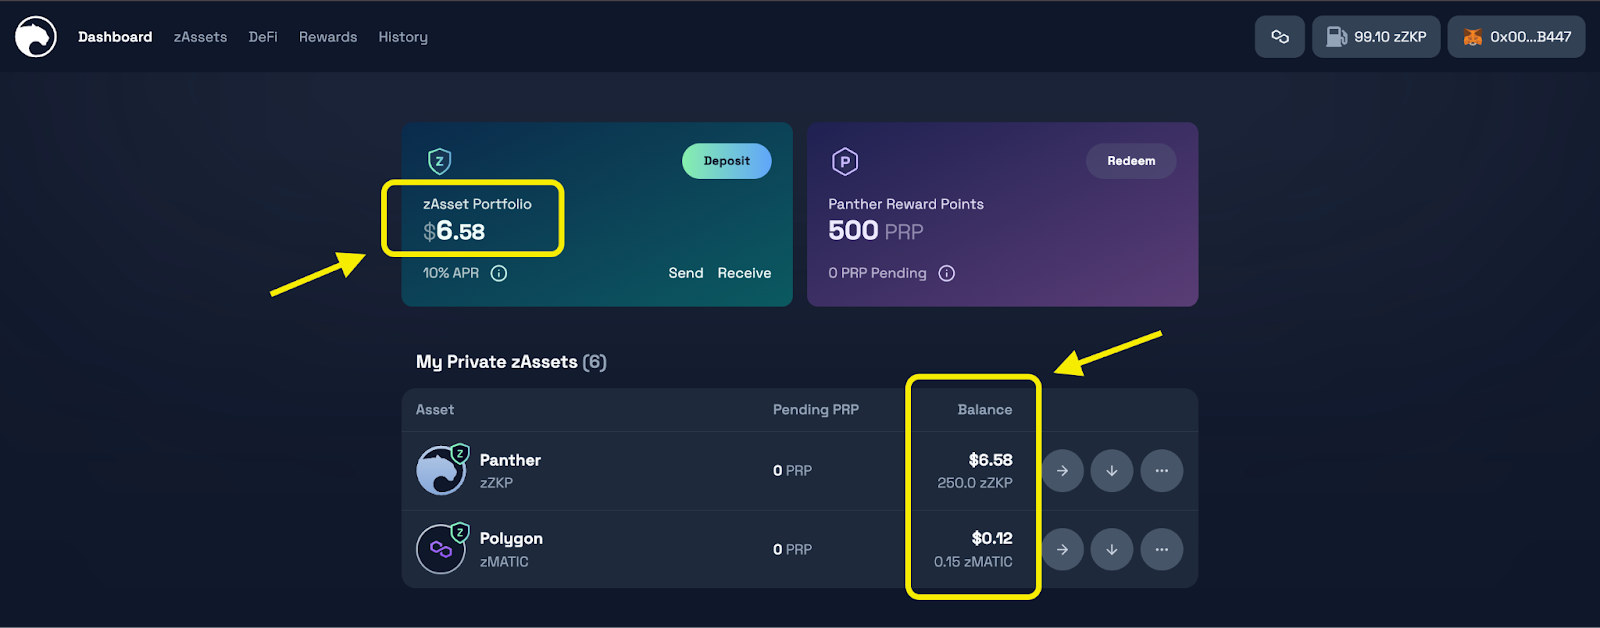
Congratulations, the deposit is complete!
You may now view the updated balance in your Dashboard, your Private zAssets section, and the adjusted balance of the deposited asset.
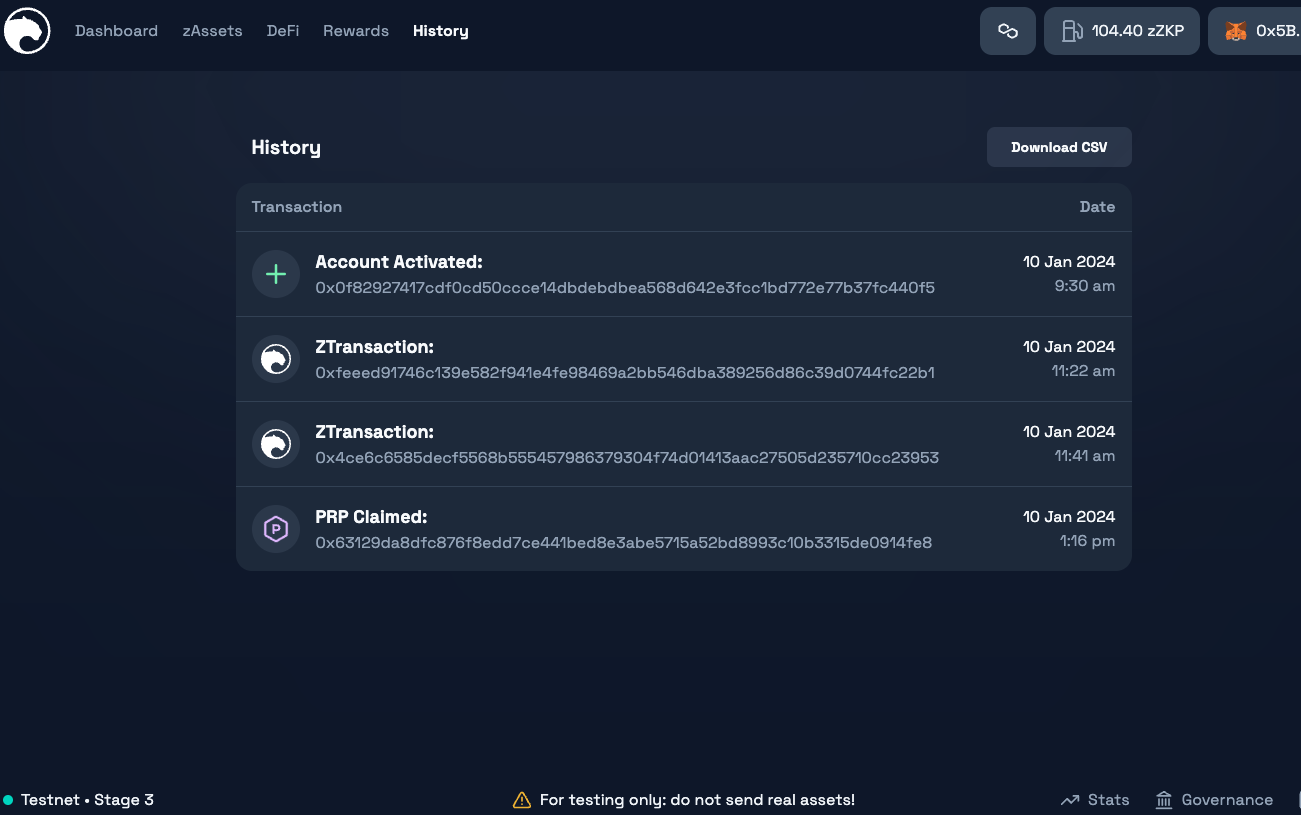
You can view your transaction history under the History tab.
This screen provides information about different types of transactions you performed within Panther, along with its transaction hash and the date/time of the transaction.
To share your feedback, kindly fill in this form.
This phase marks a significant advancement in the protocol's capabilities and gets us a step closer to our V1 release. As always, let us know if you have any additional feedback through our social and community channels.
Thanks for participating in Testnet Stage 3!
Disclaimer
For the avoidance of doubt, test $ZKP (tZKP) and test PRP (tPRP) and other tokens described in this article are for testing purposes only and have no economic value, nor can they be exchanged for value. Testnet does not provide you with, nor should be used for, any of the following: create, store, transmit or exchange tokenized digital assets with any economic value or purpose; or create, earn or receive any tokenized digital assets that have value or are exchangeable for value. Participation on our incentivized Testnet versions may result in you earning rewards, but for the avoidance of doubt, such credits are not represented on any blockchain as tokens.
About Panther Protocol
Panther is a cross-protocol layer that uses zero-knowledge technology to build DeFi solutions that meet regulatory requirements and satisfy users' on-chain data privacy needs. The goal of Panther is to allow seamless access to DeFi and create a cross-chain-supported architecture that serves different use cases. Panther's zero-knowledge primitives are also generalizable to KYC, selective disclosures between trusted parties, private ID, voting, and data verification services.
Website · One-pager · Lite Paper · Twitter · Telegram · Discord